The wimpy “City” horn from the first-generation LEAF carries over to the second-generation car, and the desire to upgrade it is just as strong.
For the ’18 car the position of the horn has changed from being in front of the radiator to down on the front lower right side of the body bulkhead. The area that the horn is in now is very tight, and access to the stock horn bracket is just about impossible without removing the front bumper cover.
The horn is still powered by a “floating ground” circuit with a positive and negative connector. Because of the horn’s tight location, adding dual-tone horns requires that they be mounted elsewhere in the engine compartment, and a longer pigtail connector be fabricated. The new location will also require a longer custom mounting bracket than before.
Most of the task of installing the new horn is accessible from the top of the motor compartment but accessing the stock horn and its wiring harness is somewhat of a hassle.
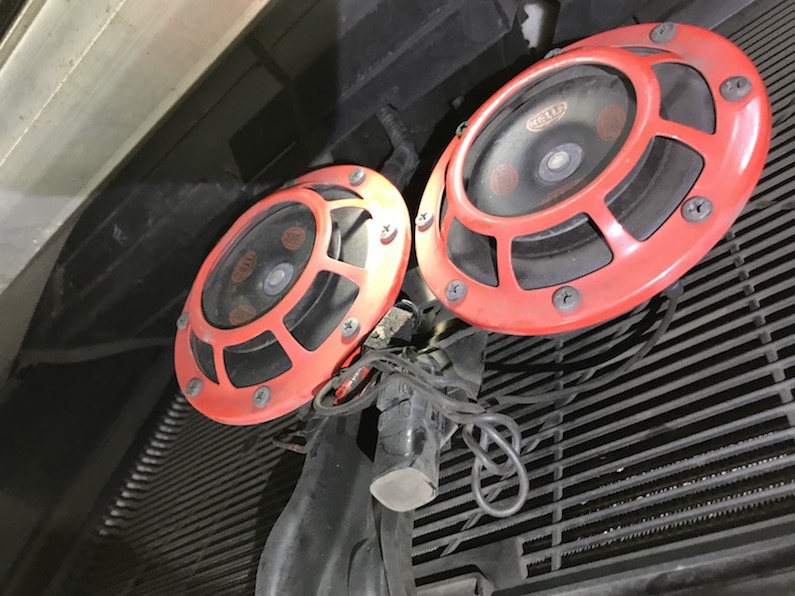
For my 2018 LEAF SL, I moved the Hella Super-Tone horns that I originally had in my 2014 LEAF SV to the new car. This is how I did it, and where I placed the new horns. No special tools were required.
Suggested tools:
- car floor jack
- jack stand to support the vehicle
- a Phillips screwdriver
- 13mm and 10mm socket
- some zip ties
- some 18-gauge wire and spade connectors
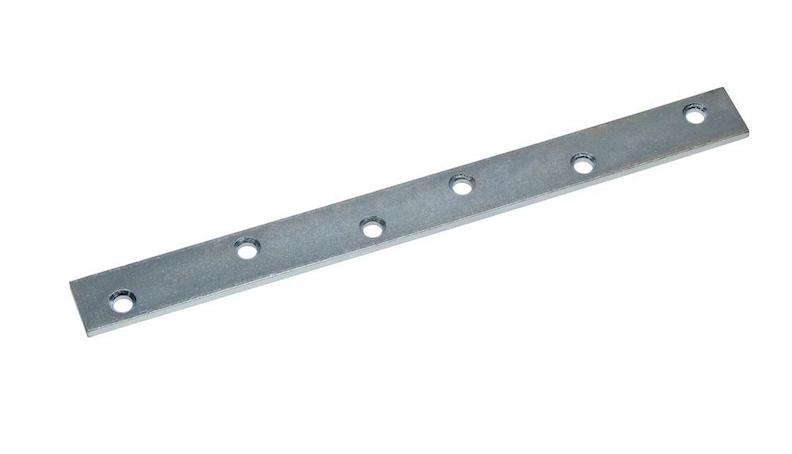
- a piece of mild steel or zinc strap mounting (also called mending plates) to fasten the horns to the car
- a drill to make holes in the mounting bracket
- a tack puller to remove the push fasteners If you are moderately handy, this DIY should take you about 90 minutes. If this whole thing gives you the sweats, this may not be for you. As usual I take no responsibility for your success or failure with this DIY
Getting at the stock horn and its connectors
Because of where the horn is located on the ’18 LEAF, this task is the most involved. It’s not necessary hard, it’s just requires removing the right-side wheel well liner to reach up in the nose to unplug the horn cable.
Removing the wheel-well liner.
Jack up the right front wheel, place a floor jack stand next to the jack for safety, and remove the wheel.
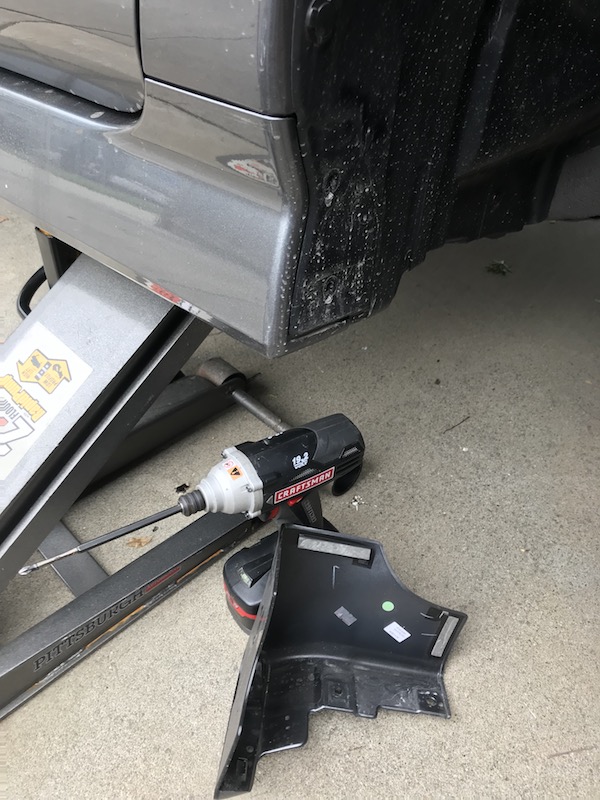
Next remove the mud flap at the back side of the wheel well. It is held in with a couple of Philips screws, push-fasteners, and some foam tape. Set that piece and is fasteners aside.
Remove the wheel well liner. It is held in with a bunch of push fasteners that are easy to remove. I use a tack puller to reach under the push tab to pull it out. The tab comes out partway and then is removed by hand.

After all the push fasteners are removed, then the front of the liner under the bumper cover has eight screws and 10mm bolts that need to be removed. Pro-Shortcut: If you have small hands, just removing these screws and bolts and a few of the leading edge of the wheel well liner fasteners can give you access to the horn.

Gently pull the wheel well liner out and set it aside. You now have good access to the horn.

Unplugging the horn cable
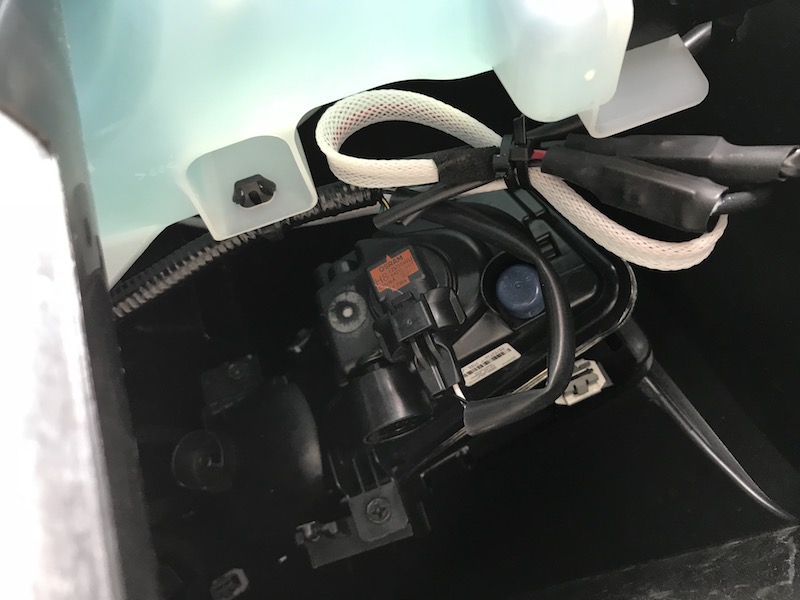
Reach up in front of the windshield washer tank and feel for the horn.
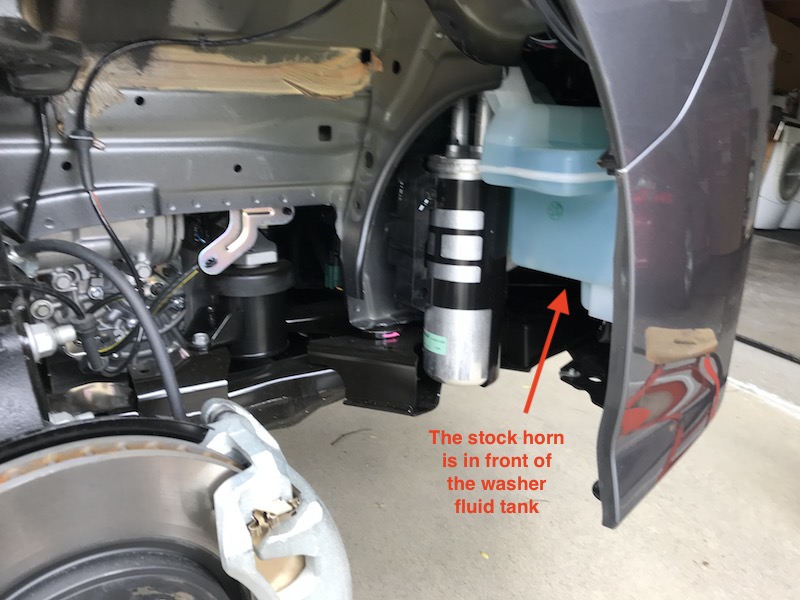

There are two wires attached to the horn, gently wiggle each one back and forth until they unplug. They have a bit of length to them so pull them down so you can see which one is positive and negative. The positive one has a brown connector and negative is black. Because of how the stock horn is mounted, I recommend just leaving it in place.

Mounting the new horns in the motor bay
Remove the front top motor bay cover. It is held in with 10 push fasteners like the wheel well liner. Take care not to drop any down in the motor bay, if you do, you may have to remove the motor bay belly pan to get them out. I found that the area with the most space for mounting the new horns is on the left side of the motor bay adjacent to the radiator mounting frame.

Make a new horn bracket. I took a piece of .018 zinc mending strip that I got in the hardware section of Home Depot, to make the horn mounting bracket. These strips are easy to bend, to drill holes for mounting the horns and mounting the bracket to the car. They are available in different lengths and shapes. I took one that was T-shaped and cut it into an L-shape for this mounting.
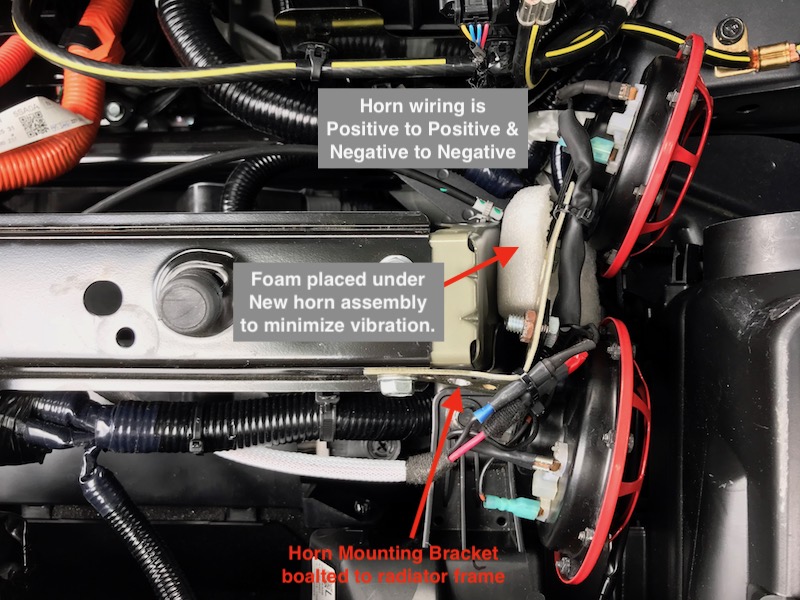
I found that the 13mm bolt holding the radiator mounting frame to the car on the left side was the best place to mount the horns. I bent the mounting bracket 90˚ to place the horns on the side of the radiator in front of the 12V battery.

After bending and drilling the mounting bracket to fit, bolt the horns on the mounting bracket and test fit it. Make sure that the electrical connectors on the horns face up so that they are less likely to get corroded. Make sure that the horn bracket does not wiggle after it is tightly mounted to the radiator frame. If it does, stick a piece of foam padding between the horn assemble and the radiator frame.
Do a test fit of the plastic top motor bay cover to make sure that the horns do not interfere with its placement. Adjust your horns and bracket as needed.

Wiring the new horns to the existing horn circuit.
IMPORTANT: Determine if your new horn’s electrical connectors have a floating ground or a chassis ground. If the horns have a chassis ground, then the connectors are polarized and it matters which connector the positive wire is connected to. If you plug in the hot wire to the ground lead, you will blow the horn fuse, and spend the rest of the day trying to figure out where that fuse is. If you have a floating ground horn, the electrical connections are not connected the body of the horn and it does not matter which connector the positive lead is connected to.
To determine if your horns have a floating ground or a chassis ground, take an ohm meter or continuity tester and connect one lead to the stud on the horn that is used to bolt it to the mounting bracket. Take the other lead and connect it to each of the horns electrical connectors. If after testing each connector for a connection to ground, if neither indicates a circuit to ground, then you have a floating ground. It does not matter which lead on the horn the power lead is connected. BUT if one lead on the horn does show a connection to ground, mark that lead as the negative lead, and the other as the positive lead. This will ensure that you won’t be looking for blown fuses later on in the install.
Make the horn extension pigtail that will go from the stock horns connectors to the hew horns. Cut two pieces of wire long enough to reach from where your new horns are going to be mounted to where the original horn connectors are in the right front corner of the car. I suggest making one out of red wire and the other black just to keep things straight. I also recommend putting the two wires in plastic sleeving to keep them together. I routed the wires along the radiator mounting frame and over in front of the windshield washer tank down to where the old horn is at.

For each wire, make a series connection to the horns with two spade connectors, one for each horn. The red wire goes to the positive connection on each horn (does not matter if the horn has a floating ground), and the black wire goes to the other connector on the horn.
Zip-tie the new horn wiring harness as needed to the car, and make sure that the connectors on the horns are insulated so that the power lead can’t get accidentally grounded and blow the fuse. I use shrink tubing to make sure the connectors are properly insulated.
Next connect the other end of the pigtail to the original horn connectors that are down where the old horn is. If your horns have a chassis ground, before you connect the power lead, check one more time that you have the power lead on the new horns connected correctly.
Once the new horns are connected, push the horn button on the steering wheel VERY briefly.If you get a blast, congratulations you did it! If you get silence, check your connections again.
Putting your LEAF back together

This is the easy part, and the goal here is not to have any parts left over, or not enough parts to get everything bolted or fastened back together.
Make sure that the physical connections of the horn electrical connectors are solid.Make sure that the 13mm radiator frame mounting bolt that the horn bracket is mounted to is tight secure and level.
Replace the front top motor bay cover and it’s 10 push connectors.
Make sure that the new horn wiring harness is secure, up out of the way and that the connections are tight. I put a piece of shrink tubing on those connectors to make sure they stay dry.

Reinstall the wheel well liner. I start with the push connectors inside the wheel well and work around to the front of the liner, with the screws and bolts, then the last thing to reinstall is the mud flap.
Bolt the wheel back on, the proper torque for the lug nuts is 83 ft-lbs. Pull out the jack stand, and lower your LEAF. Get behind a big-ass SUV and test out your LEAF’s new voice!