
 The great thing about the Nissan LEAF is the minimal amount of maintenance that is required to keep the car running in tip-top shape. One of the “Major” maintenance items for the LEAF is the annual or 15,000 mile replacement of the cabin air filter.
This DIY is applicable to 2011 through 2018 LEAFs. The HVAC system on the LEAF is shared with other Nissan vehicles that use the same “B-Platform” There are close to 12 vehicles world-wide that are based on this chassis.
The replacement of the cabin air filter in the LEAF is very easy, but has some “gotchas” that can sneak up on you if you are not careful. The cabin filter is also in a very tight space under the dashboard, and requires some contortions to access it. If you are a big person, or have big hands, you may find the replacement of this filter difficult or cumbersome.
It is recommended that the cabin filter be replaced annually or at every 15,000 mile battery check. The LEAF cabin air filter is available from a variety of sources since the LEAF filter also fits a large number of other Nissan vehicles. Prices vary from about $10 on Amazon to almost $50 from your local Nissan parts counter. There are 2 types of cabin air filters, one uses microfiber to trap particulates including pollen, and the other adds a layer of activated charcoal to not only filter particulates, but also to trap odors. The combination filter is the more expensive of the two. If you have your Nissan Dealer replace this filter, plan on spending up to $100 for just the labor plus the retail cost of the basic filter. Many LEAF owners have reported spending upwards of $150 or more to have this filter replaced.
If you follow the instructions in this DIY, you can spend as little at $10 to replace the filter, and then you can use the $140 you just saved on a great evening with your significant other!
To replace the filter, start by moving the passenger seat all the way back so that you will have some room to work, and empty out the glovebox.
Next remove the trim panel under the glovebox in the passenger footwell.

This trim panel is held in by 5 clips and just pulls down and out. Start on the right side of the panel and gently pull the panel down.

Next from inside the glovebox, remove the access door on the left side of the glovebox. There is a little latch in the back of the door with a finger access. Pop the latch and pull out the door .


The next steps can be done by either working through the small access door in the glovebox, or preferable working from underneath the glovebox and using the access hole in the glovebox to see what you are doing. It helps for the next couple of steps to have a flashlight or work-light on to illuminate the filter access area.
The next step is the most difficult part of this DIY. Next we must remove the white access hatch cover on the side of the Heater/AC box.
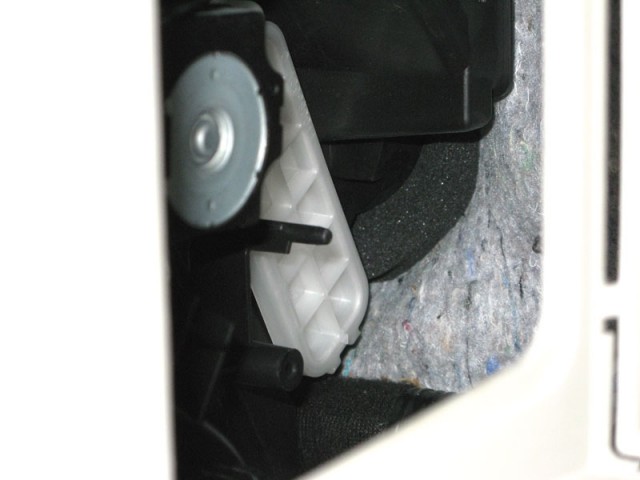
This rectangular hatch is secured by a clip at the bottom that is a molded part of the hatch cover and because of its position on the bottom of the hatch, how tight it is under there, and how awkward it is to reach under there, it is very easy to break this clip off. Patience is the watchword in popping off the clip and removing the hatch cover.
I found that a small 4″ flat-bladed screwdriver works for me. Gently insert the screwdriver between the clip and the body of the heater box, and twist the blade of the screwdriver just a bit to get the clip to spring off of its tang on the heater box. It just takes a bit, and I mean “just a bit”! Once it is loose, then rotate the cover upward to disengage it from the clip at the top. Now the filter will be exposed. If you have long fingernails, you can also spring the clip using them as well.
Because this step is so difficult and invariably there will be some that will break or stress this clip, there are solutions to save the day. You can get a replacement cover at your local Nissan parts counter for about $5.
If you do break off the clip, you can also do a pretty effective repair using superglue and your kitchen brûlée torch. Use the superglue to reattach the clip to the cover, and once that has set, take your brûlée torch and very quickly and lightly pass the tip of the flame over where the break was. The superglue will help fuse the clip back to the cover, and will give the cover extra life until you have time to get a new cover that you can replace at your next filter maintenance. One ingenious LEAF owner took this one step further with the new clip and attached a lanyard to the end of the clip making the springing of the clip foolproof. I highly recommend this modification to the cover.
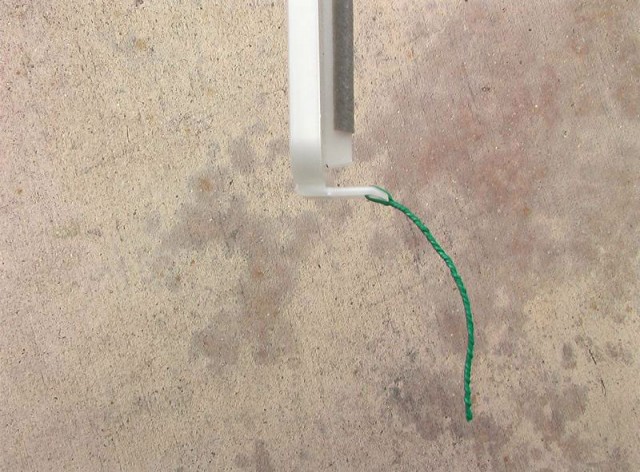
This lanyard was made with floral decoration wire, but just about any thin wire or twine will work.
Now it is time to remove and replace the filter. The hatch opening on the side of the heater box is smaller than filter, so it must be squeezed in and out of the hatch. To remove the old filter, pull on the tab on the side of the old filter to get it out partway, then pull on the other side of the filter to get that side out. Depending on the manufacturer of the filter, the tab may be on the top or the bottom.

Here is a filter removal trick that I learned the hard way. It is recommended that a rag or towel be placed on the footwell under to the filter access hatch to catch all of the larger detritus that the filter has caught. As you pull out the filter, a good part of that stuff will come off of the filter and fall into the footwell. Better to catch it in a rag, then clean it up later. Never the less, once you are done removing the filter, it is a good idea to vacuum up the area, and if you can get a crevice tool in the filter access hatch, clean that out too.
Now installing the new filter is the exact opposite of the removal. Squeeze the end of the filter to get it into the heater box. Pay attention to the proper orientation of the filter, there will be an arrow pointing forward, make sure to install the filter pointing that way. After you have the filter in the heater box, you will need to move it around and poke it a bit to get the filter to spring completely open and straight. Use the tab on the filter to help with that.
Next reinstall the access hatch cover, hook it into the top pivot clip first, lining it up side to side, then swing it down and until the bottom clip snaps in place. If you added a lanyard to the clip, make sure that it is hanging in a way that is accessible.
After you have the access hatch cover secure, replace the access door in the side of the glovebox, and the lower trim panel under the glovebox, and you are done!